Getting Started With Tile Maps in SpriteKit
July 10, 2016
At WWDC 2016, Apple welcomed support for tile maps directly in the SpriteKit framework. Creating scenes with tiles will now become a seamless process directly in Xcode. This post will focus on the steps you need to take before starting on your game logic/building your map.
Creating sprite resources
So you found some awesome graphics you want to use to create your tile maps? But they are all arranged in a tile sheet, and Xcode wants each individual image as a separate resource?
For this example I will use the phenomenal Toen’s Medieval Strategy v.1.0 graphics pack, which consists of 16x16 top-down sprites.
By the power of imagemagick we can extract these to individual images.
Boot up your brew and install imagemagick
brew install imagemagickImagemagick is now available throught the alias convert
First we create the target folder, which will be a .atlas file for Xcode to later optimize the resources.
mkdir defaultTiles.atlasThen we extract each tile of the tilesheet. You can be clever with the naming to make it easier to organize them later.
convert -crop 16x16 tilesheet.png defaultTiles/tile-%d.pngNote: If your tile sheet has margin, you need to manually crop them so that the tiles fill the edges.
Add resources to your project
In your Xcode project, just add files and select the .atlas folder you just created. Atlas generation should be automatically enabled in Xcode 8 beta, and all your assets are now available in the Media Library view down in the right corner.
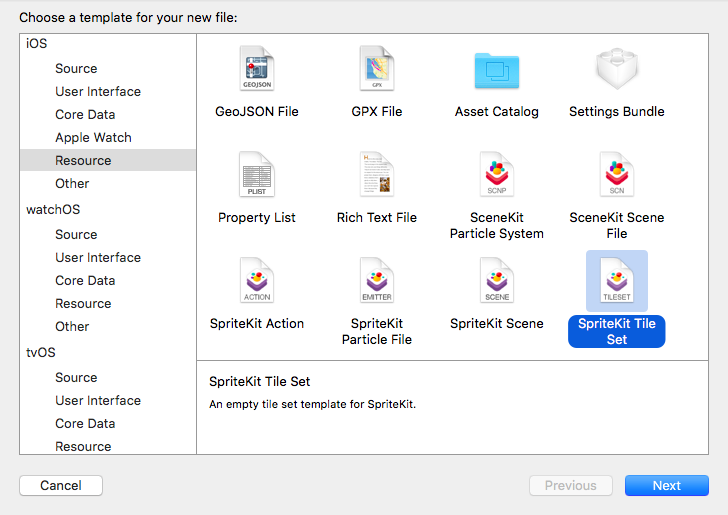
Now you can easily create a tile set with these newly imported resources. Simply select the type of tile set you want, and drag the respective images into their place.
Tip: Right-click -> New and 8-Way Adjacency Group to get the template for a complete tile set with corners, edges, middlepieces and the whole shebang.